
Once your order is received, we start your container homes construction process to order you a brand-new container for you. We do not use second-hand, refurbished, or collected containers from other parties who claim to deliver new containers. All our containers are brand spankers.
We want all our customers to have the assurance of knowing that our containers have never been used in any overseas shipping or transportation of hazardous goods.
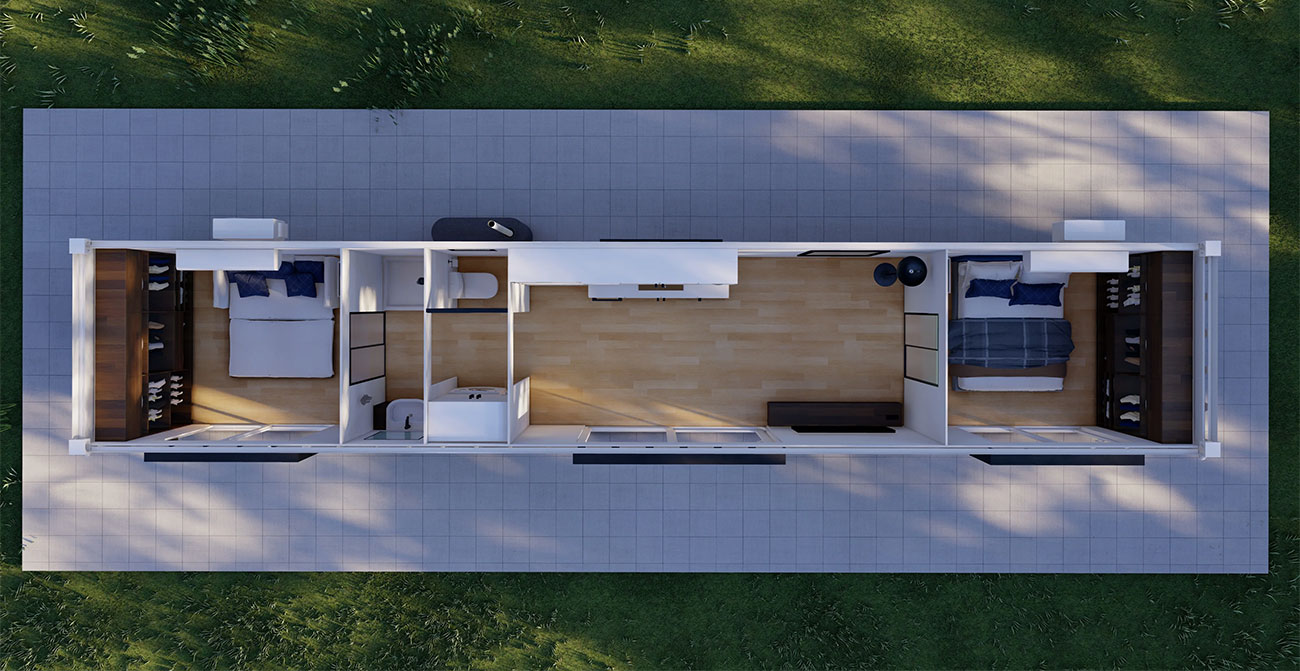
When the container arrives at our manufacturing workshop in Keilor Park or Port Melbourne, Victoria, we first cross-check with our customers to see if they are satisfied with the floorplan layout they have selected.
Once approval is received, we cut all openings in the container to suit all sliding doors and windows. We then cut and weld all openings with 75mm x 50mm steel tubing to give you that tough steel look.
Then we cut, weld and install all window and sliding door shrouds (200mm) for that extra touch of water-resistant protection along with the featured benefits.
The whole container is then cleaned and sprayed with the color of your choice. We have a wide range of color selections you can pick from.
We cover and insulate the existing 28mm marine-grade flooring with a subfloor.
The subfloor is built from pine timber measuring 90mm x 45mm.
In between we insulate with R1.8 sisalation paper and R3.5 75mm Primax foam panels.
All our container homes come with a 90mm step up subfloor. We install subfloors to raise the floor level for thermal insulation and prevent and block outside dust and debris.
We then wrap the internal walls between the container and treated pine timber frame with R1.8-rated sisalation paper, giving you that extra thermal insulation throughout.
Carpenters then kick off with the framing of the container using the best quality timber for your container home. We use 90 x 35 and 90 x 45 treated pine and LVL lintels of 190mm x 45mm above all sliding doors and windows. We know this is an overkill of engineering and carpentry but it makes us feel good knowing we went that extra distance that no one is willing to offer. Lastly, triple grips are applied to all framing joins.
Once that is all achieved and inspected we then go ahead and prepare for step 6,7.8.
Our plumbers are then notified and arrange for the following to be installed: Complete plumbing system including separate lines for hot and cold water, waste, and sewer line. Internal connections of kitchen sink , toilet suit, shower suit, vanity and european laundry (completed and ready for fit off).
The first step in electrical wiring is to design the electrical system that suits your needs. This includes determining how many outlets and switches you need and where they should be located. Once we have designed the electrical system, our expert electricians install the electrical panel including circuit breakers . The Mechanical ventilation system is then prepared and ducting is placed ready to be fitted off after painting is completed.
At this stage our insulation experts pop in and start insulating your container walls and ceilings with R 3.5 Earthwool insulation unless otherwise specified.
13mm Fire check plasterboard is delivered and installed by our installers. All plaster work is base coated and top coated for a smooth clean finish.
Fixing is installed, consisting of architraves, door jambs and required fixtures.
After plastering and fixing is completed, Painters pop in and give the container home its first 2 coats of Dulux durable paint.
Cabinet makers install kitchen, European laundry and vanity.
Plumbers and electricians fit off all components in specification list.
The container homes are then painted and the final touches are put together, which include the floor and wall coverings (internal and external) fixtures and features.
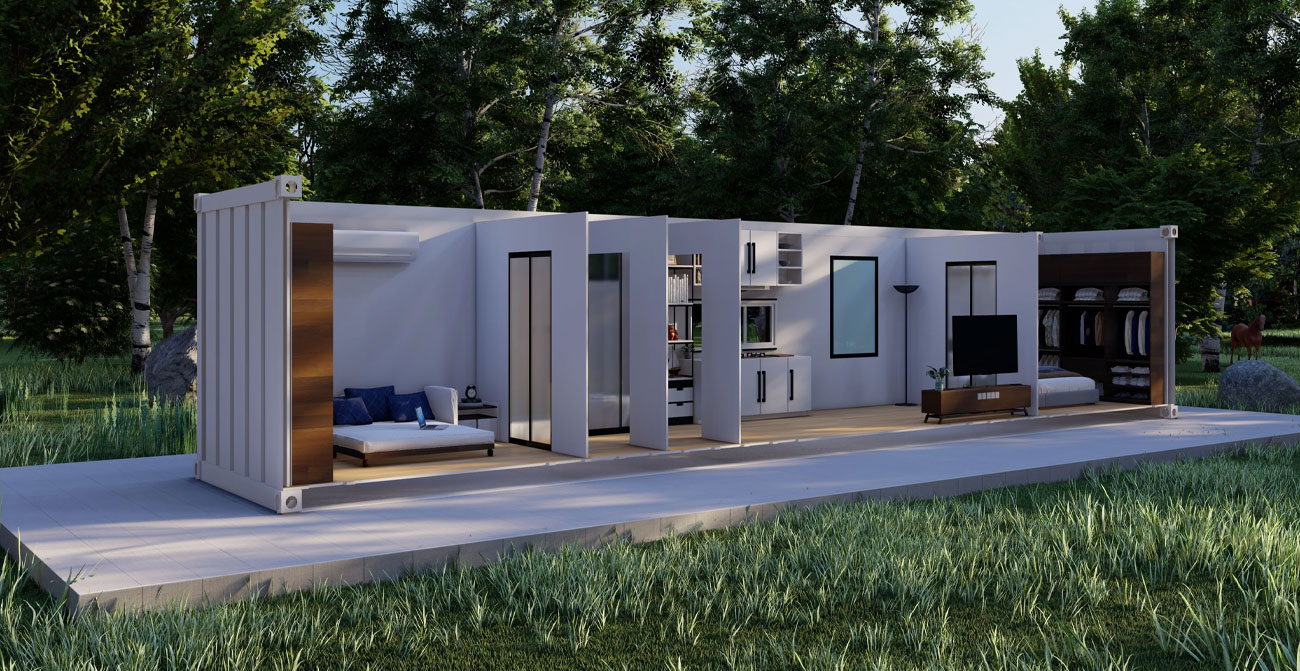
After we finish our container homes construction process, we invite you to come to our showroom and inspect your luxury container home prior to delivery.